Hello and Welcome to my virtual table! Have a seat sip your coffee (or drink of your choice) while I share with you some of things that are happening on and around our table. Our table is so many times the 'happening place' at our house. We do so many things there. We color Easter eggs, decorate Christmas cookies, blow out birthday candles, do crafts, work on homework, share stories of our day at dinner, and so much more. We have laughed, cried and everything in between at the table.

Saturday, September 29, 2012

Ice excavation

Ok so somehow or another I didn't publish this. I don't know how that happened. Anyway it's a little late but oh well maybe idea for you all to use next summer.


Since it's so hot here I decided to do an activity that would keep them cool. We can't do sprinkler or pool or things like that because of the drought. So I went searching for ideas on the internet. This is what I came up with. 
ICE EXCAVATION!!

Things you'll need:
small toys or other small items
plastic container(s)
water
food coloring (optional)
freezer space (this was the problem for me lol)
toys for excavating (I let the kids choose most of those I gave them water bottle full of warm water)
salt (optional, to help the melting go a little faster)

I got some of the toys we used for this at the dollar store. I wanted to put some new toys in there to help keep them excited. I figured if they were working for new toys they'd keep working more so than if I used all toys we already had. I did use some of the toys we already had. I divided the toys into 3 groups (1 for each of the 3 containers I had).

I started by freezing a little water on the bottom of each container.  Once the water had set I put half of the toys in the container and filled the container a little over half full of water. Once that was frozen I put the rest of the toys in and filled the container completely up with water. This whole process took 2 or 3days. So this is a plan ahead activity.

Since we are only going to be living here for a few months then moving on again we didn't put sand in our sand table. Since it's been empty we've used it many times for water activities. This activity seemed like a really good one to use our table. So that's what we did. I put the containers filled ice in the table and let them have fun. I had to help them get ice out of the container. 
 Once it was out I sprinkled a little salt on the ice. They started out with using just forks to try to get the toys out. NOT A GOOD IDEA. No one got hurt but they were a few near missed before I took the forks. Lesson learned LOL. 
 They had fun trying out all kinds of different things. 


They eventually gave up with using the tools. They moved to the patio. Where they dropped their ice chunks a few times to break them up. Then they started drawing pictures with the ice and then watched their drawing disappear. 
After some time they finally got out all their toys. They enjoyed playing with their new and old toys alike. 
Here is a picture of the toys and some of the tools used. The toys are on the table. The tools are in the plastic container.

This activity took up one whole hot afternoon. It was a great way to keep cool when it was so hot.

Hope this gives you some inspiration to get out in the yard and have fun with your kids!

Vegetable Chowder

Today was a chilly rainy day. So I decided today would be a perfect day to try out a new recipe I came across somewhere on the internet. Well the recipe gave me the idea but I changed a good bit of it. I have been wanting to do a soup and salad day for a long time and finally it was cool enough outside to do it. My husband isn't usually happy with a non-meat meal but we garnished our chowder with bacon, so it was all good. I made up a simple garden salad and baked up a fresh loaf of bread and it was a perfect meal. 

For my salads I don't toss the stuff together because we all like different things. I bought a bag of lettuce from the store. I chopped up some tomatoes, fresh broccoli, and green onions. Then I grated some cheddar cheese and carrots. I also chopped up and fried a package of thick-sliced bacon. The cheese, bacon and green onions serve the dull propose of salad toppers and soup garnishes. 

Then for the bread I cheated. Yep that's right I went the short cut way and used frozen bread dough. I have 4 kids so I think I am entitled to cheat now and again, LOL. Plus I haven't found a regular bread recipe that I like yet.

Now onto the soup! This was incredibly easy to make. So with out further ado here is the recipe!

2 lbs red potatoes (I left the skin on but you can peel them)
1 lb. fresh broccoli florets, no major stem pieces
1 lb. fresh cauliflower, same as broccoli
1 lb. fresh carrots, peeled and sliced
leeks (optional), cleaned and sliced
2 TBS minced garlic
64 oz. chicken or vegetable stock

1 quart half and half
12 oz. cream cheese

Chop all the veggies into chunks. It doesn't matter what they look like because it will all be mashed up later. Put everything except the half and half and cream cheese into a stock pot or a crock pot. I cooked mine on the stove for about 4 hours on low. You can also do this in the crock pot for about 8 hours. Then after all your veggies are soft take a potato masher and mash it all up. I did this right in the pot. 
Let your cream cheese come to room temp or pop it into the microwave a bit so that it's easier to work into your chowder. After you have mashed it all up add your cream cheese and half and half. Let it cook just until it's warm. You do not want to cook your chowder much after you've added the half and half because it will curdle and ruin your chowder. This makes about 15-20 servings depending on what size bowls you use. 

This does feed a crowd so this is good meal to invite some friends or family over to help you enjoy!
From my table to yours I hope you Enjoy!

Thursday, August 30, 2012

Snack fit for a Toddler

I know it's been a while since I've posted. Back to school time always seems to be such a busy time. Getting everyone settled into a new routine always proves to more difficult than I expect. For now I am posting a super simple and easy snack idea. I promise to get back to better postings next week. 
OK for some reason blogger won't let me put pictures on here so you'll have to survive with no photos for now. Anyway onto the snacking part.

What you'll need:
crackers (I used whole wheat ritz crackers)
peanut butter (or anyother nut butter)
banana


Yep that's it. Really. Spread a little peanut butter onto your crackers then top with a slice of banana and your have a yummy snack that your kids will fight over. Well mine do anyway because I can only make them so fast and they fight over who gets the next one. LOL 

Enjoy! 

Tuesday, August 14, 2012

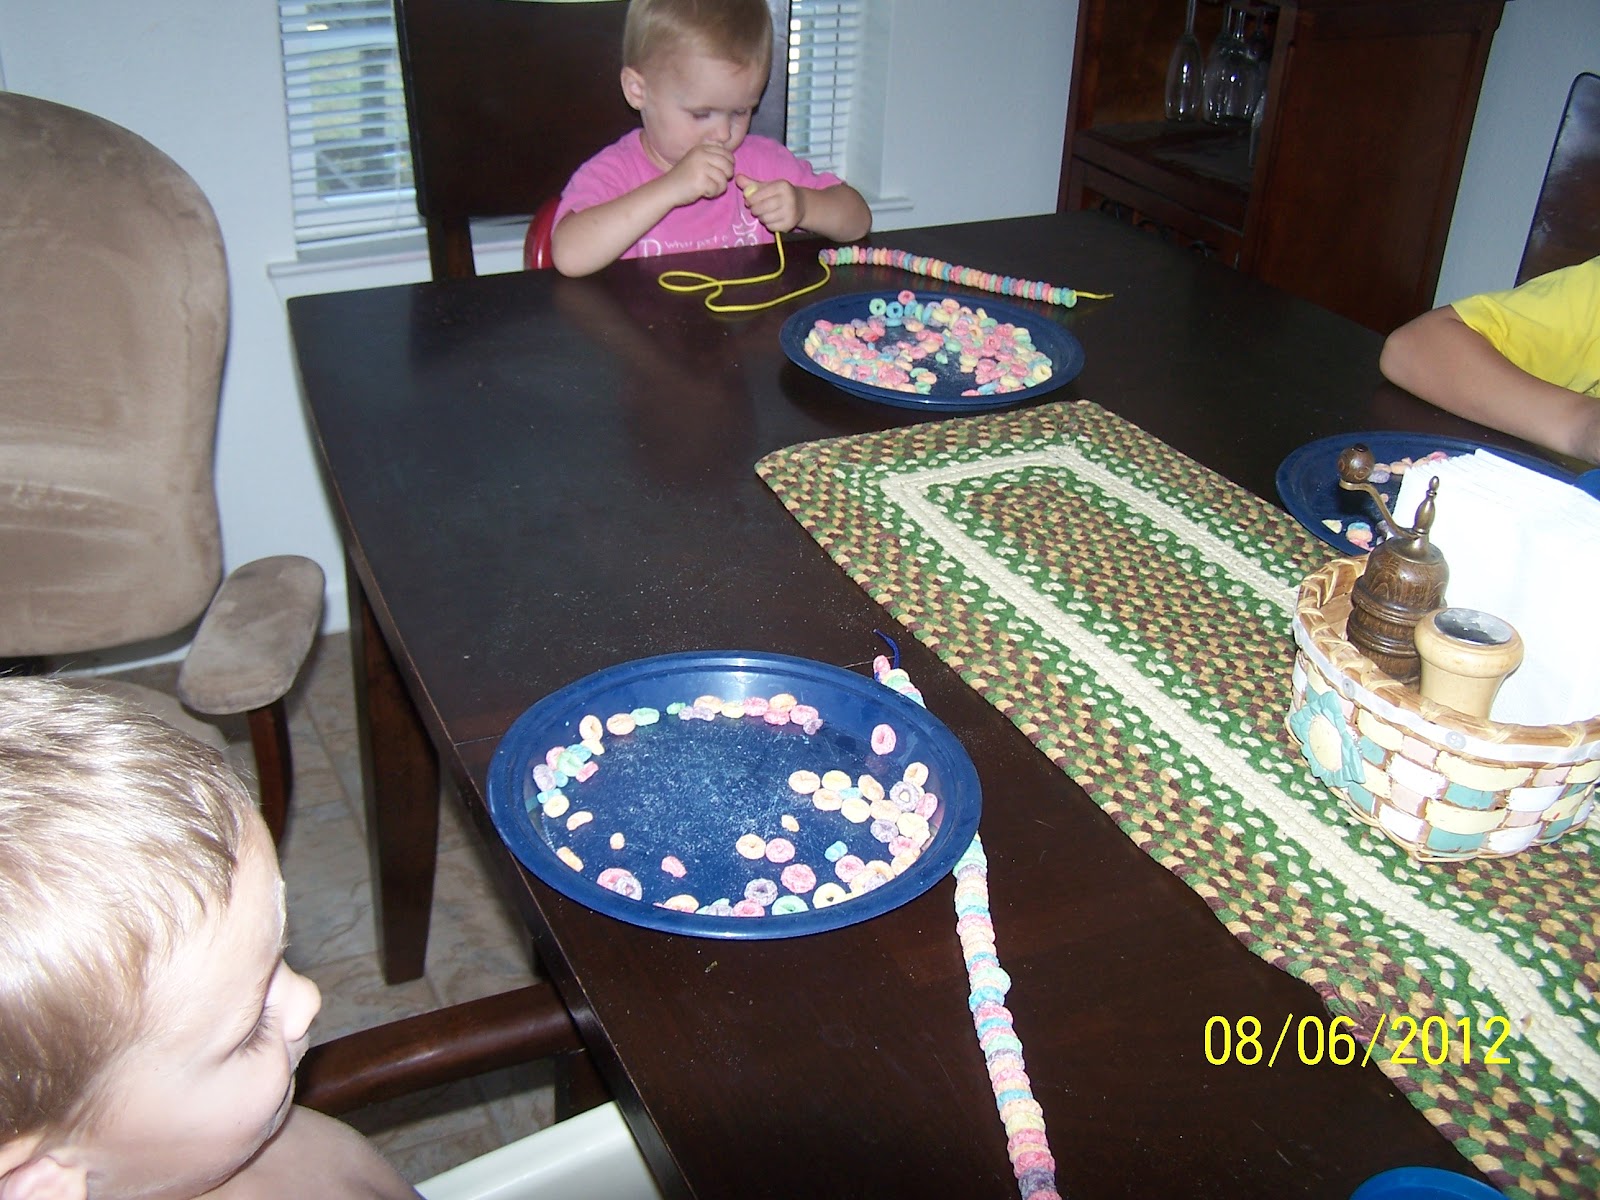
Cereal Necklace

I think at one point in time every child does this activity. I know I did and all 4 of mine have done it more than once. 
Things you'll need:
String (I used ones from a sewing activity that I saved after the card board pieces were worn out. Of course   I washed them in the washing machine before we used them)
plate or bowl
cereal with a hole in the middle
Tape (if you use yarn)

First thing you want to do is take a piece of tape and wrap it around the end of your string if it doesn't have a hard end on it already. The tape makes it easier for little fingers. I used shoe strings so I didn't have to do this step. Then take one piece of cereal and tie it on the string as shown below. This prevents the cereal from coming off the other end of the string and falling to the floor. 
 We chose to use fruit loops for 2 reasons. 1: They are a bit bigger and easier for smaller fingers to handle and 2: We are learning colors and this was a great chance to talk about colors with them. I would occasionally say something like "what color are you putting on?" or "Andrew, Katey is putting on a blue one can you find a blue one to put on?" It wasn't constant but just a few prompts here and there to get them talking a little.  
 Of course they were eating as they were stringing. LOL
Katey kept showing me each piece before she put hers on as you can see in the picture below. I let them tell me all about the cereal and how they were making a pretty necklace. I had to help and encourage the 2 littlest one quite a bit to keep them going because at first they were having a hard time. A little bit of help and a LOT of encouragement goes a long way. 
 Even the older kids had a good time with the project. Sarah separated her's by color. Albert started to make a pattern but quickly gave that up. He did a few small patterns through out the necklace but he doesn't have the concentration needed to keep going with one pattern for to long. 
 So when they are all done with their necklaces simply tie the ends together and you have a beautiful snack! When I tied them together I left a little empty string in the necklace part so that they didn't have cereal on the back of their necks.
Have fun and Enjoy the chatter and smiles!

Sunday, August 12, 2012

Honey Mustard Dipping Sauce

Honey Mustard Sauce!!

This recipe is super easy and one of my favorite dipping sauces! 

Things you'll need:  pictured below
(I don't actually measure but if you are going to actually measure substitute a measuring spoon for the teaspoon)
 Put equals parts honey, mustard and mayo into you bowl. I usually use 2 tablespoons of each. Then put a dash or so of Worcestershire sauce(or in the words of Emeril what's that here sauce). It ends being about 1/4 teaspoon of the sauce.
Then whisk if you have one of these wonderful little whisks or mix with a fork.
And you have yummy sauce to smother your chicken nuggets! Sometimes for a bit of extra flavor I put mustard powder in it. You can also add a bit of hot sauce. I have also made this with different kinds of mustard. They all turned out well. So you don't have to use regular yellow mustard but that's usually all I have on hand.

Hope you ENJOY!! If you try this or any of my ideas on this blog page let me know how it turns out.

Thursday, August 2, 2012

crown craft

First I would like to apologize for the bad quality pictures. I took them with my phone and the sun was shining in the window so they came out blurry. Sitting at the table was as close to being still as I could get them so this is all we have for pictures this time.

Today's post is a fun and super simple craft. 
Things you'll need:
construction paper
scissors
crayons or markers
stickers or other things to put on your crown
tape or stapler

My oldest daughter did this with the kids and here is what she did. She let the kids pick a color of construction paper. Cut Down the middle of the paper long ways cut a zig zag line to create the points. The paper she used was left over stuff so in the pictures you see it isn't as tall as it would normally be. Then you take the 2 sides paper and staple or tape two the pieces together but only one end because it still needs to lay flat so they can decorate. 
Then let them decorate by coloring, sticking, and gluing until they are satisfied it's beautiful.
Then staple or glue it so that it's a circle. 
And you have a beautiful princess......
 and handsome prince! They even made a crown for their 'special friends'. (aka the animals they carry everywhere.)
We did this activity yesterday and they wore them all day yesterday. Then as soon as they woke up today they put them on. So I guess this activity was a success for them. In the future I will try to take better and more pictures of the work in progress.

Wednesday, August 1, 2012

Snack Carrots

My kids love munching on carrots. However the little ones have a hard time with them. So I have come up with a solution........
Boil your carrots. Duh why didn't I think of this a long time ago. Cook the carrots until they are softer but still a little firm. Then cool, put in a reusable plastic container or ziploc bag. Then your little ones won't have such a hard time eating them. My oldest son doesn't like to eat them so he warms his up first but the others eat theirs cold like they would a raw carrot. Yummy, easy and healthy snack!